


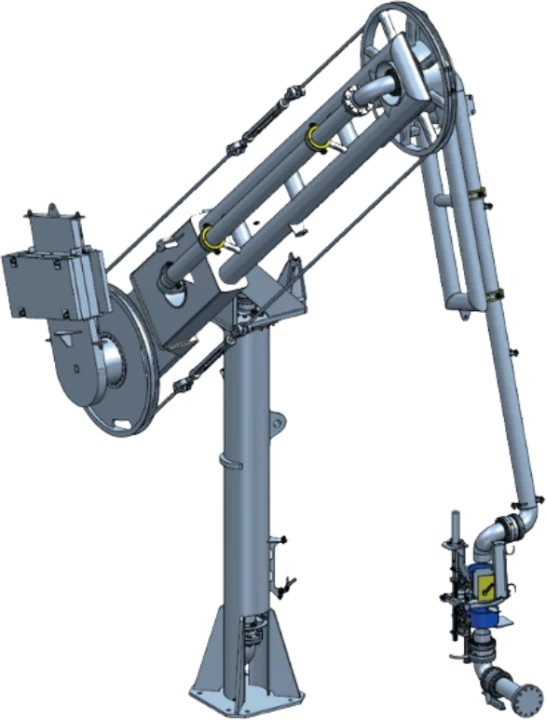


Welcome back to another edition of “How to…”. In this series, we take a look at the products in EWFMs extensive range and provide you with instructions on how you can get them to last longer. Previously, we looked into how you can maintain your Model 2175, 2174 Swivel Joints and Manntek Dry Disconnect Couplings. In this months edition, we have decided to go in a different direction and tell you how you can install and use one of EWFMs Loading Arms. The Loading Arm that we will be focusing on today is the Model 2874 LPG Bottom Loading Arm Station which is manually operated.
How to install the Loading Arm:
- When ordered, Loading Arms are installed on the standpost as per the customers requirement.
- Remove the Loading Arm from the crate and place it onto the prearranged fixing point (Base Plate) on the floor. Before this, ensure the base plate is level by using a spirit level as it needs to be perfectly horizontal and the standpost perfectly vertical. These are essential for the correct Loading Arm movement.
- Fix the standpost to the base plate ensuring the bolts have been tightened as much as possible.
- Connect the pipelines to the base flanges of the arms.
- Connect the drainage flexible hose flanges pos. 13/36 to the drainage line.
- Connect the nitrogen purge flexible hose flange pos. 16/39 to the drainage line.
How to operate the Loading Arm:
Once all of the steps above have been followed, you should now have an operational Loading Arm. To use it:
- Make sure that the Loading Arms are functioning in all parts without any damage.
- The tank truck should be positioned under the loading gate facility, in the correct loading position.
- Unlock the Loading Arm from the parking position, which can be done by removing the locking pin. Move the arms from the parking position to the tank truck connections, opening them with a horizontal movement.
Note: In order to proceed with this operation, after unlocking the arm, we suggest steering the final part of the arm with the handles and rotate it 90° towards the tank connection (proceed with the liquid arm first).
- This way, the arm will be easy to manoeuvre, because in this position the arm is perfectly balanced.
- After that, connect both loaders to the respective connections of the tank.
- Start the loading operation by opening the valve installed at the end of each arm by turning the lever.
- When the loading is completed, close the valves turning the lever in the opposite direction, then disconnect the arms from their respective connections of the tank truck.
- Close the arms with horizontal movement until they reach the correct parking position. You will then lock them by inserting the locking pins in their holes.
If you have any questions about the above, then please get in contact with our sales team who we will be more than happy to assist you.
Contact information:
Tel : +44 (0) 1763 248650
Email : sales@ewfm.co.uk
To keep up to date with news on how we are supporting our customers, our latest blogs and new services available, keep checking in on our website throughout the year and follow us on social media including LinkedIn, Facebook, X & Instagram.
